I figured out how to build usable library packages. Now I just have to work out how to get them published.

I want to make it as easy as possible for others to find and consume my packages. As with package build, I want the process to be lightweight and easy to maintain.
Public Repositories
The first step is deciding where to publish. NPM is the obvious choice. It’s the original and most popular registry for JavaScript packages. All the JavaScript package managers install from NPM by default. Publishing public packages is free.
Nothing is ever completely obvious. My project is hosted on GitHub. GitHub has its own integrated package feature. What’s more, NPM is owned by GitHub. Maybe I can publish via GitHub, using my existing credentials, and it will be accessible via NPM?
That’s not how it works. GitHub Packages is an independent package registry. Using it requires extra configuration in your package manager. Even worse, you need additional configuration in your package manager for each user or organization you want to consume packages from.
Why would anyone publish to GitHub packages if it adds all this extra friction for your users? The wisdom of the internet says that GitHub only makes sense for private packages. Enterprise users are used to all the additional crap that comes with working for a large enterprise. If you’re a small business, GitHub has a free tier for private packages, while NPM requires a monthly subscription.
NPM Scopes
You may have noticed in my last two posts that the sample app imports the react-virtual-scroll package from "@candidstartup/react-virtual-scroll". The “@candidstartup” part is an npm scope.
You can publish unscoped or scoped packages. Scoped packages are the natural choice for anything new. Scopes act as a namespace. I can use whatever name I like within a scope without worrying about clashing with other packages. Every conceivable name for a react library of virtual scrolling components is already taken at the global level, so I’d have to use a very contrived name if I was publishing an unscoped package.
There’s no extra config to consume scoped packages. Just include the scope in the name when importing or declaring a dependency.
Finally, scopes improve security. They reduce the risk of npm substitution attacks as no one else can publish to your scope.
Creating an NPM account
Before going any further I need to create an npm account and secure my “candidstartup” scope. Scopes follow the same naming rules as npm packages so no funny symbols or capital letters. Scopes are tied to npm organizations so I need to create one of those too.
Creating a user account was simple enough. Two-factor authentication was strongly recommended, so I turned that on. I already use Google Authenticator for other accounts and it’s supported by NPM.
Once you have a user account, you can create an organization. The organization needs to have the same name as the scope you want to use.
Package Metadata
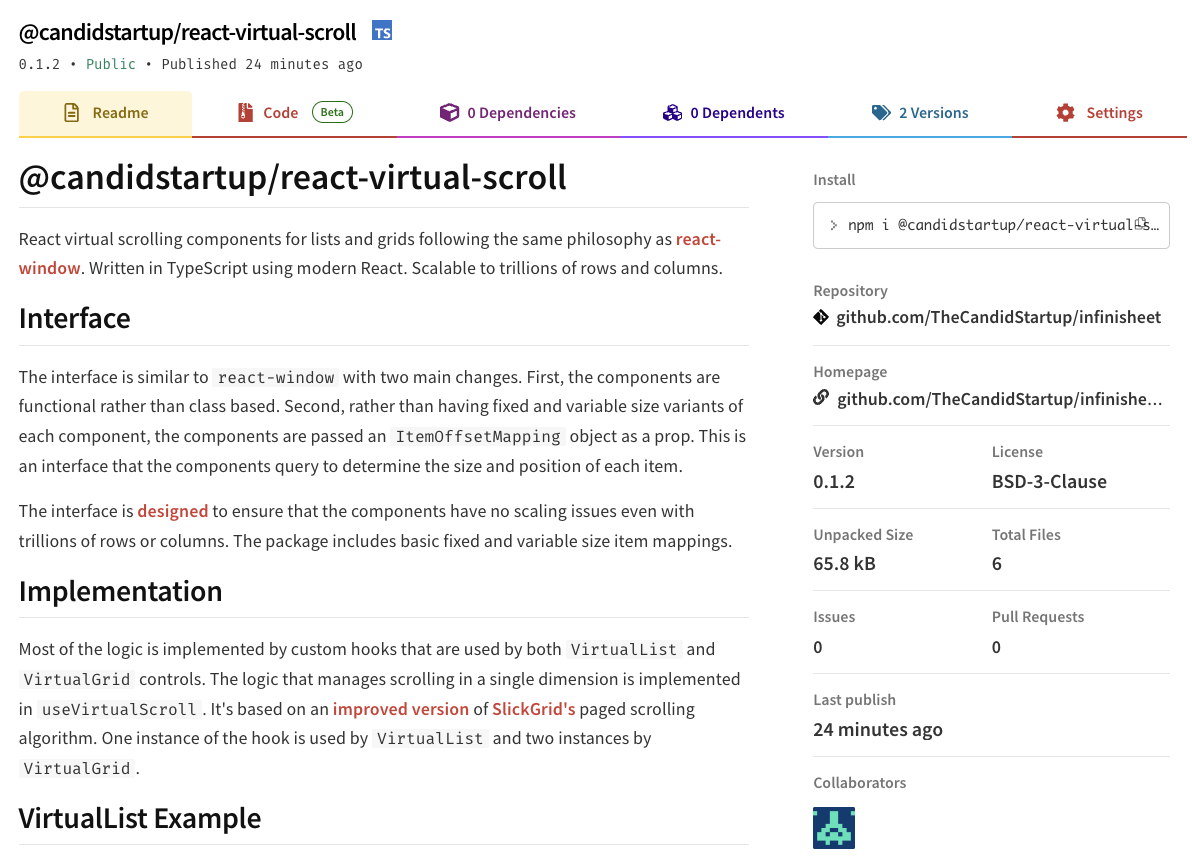
Scope secured, I was ready to try publishing a package. Fortunately, I decided to have a look at some other NPM packages first. The UI displays lots of useful metadata, most of which I didn’t have in my package.json.
Here’s what I ended up adding
  "description": "Modern React components for lists and grids that scale to trillions of rows and columns",
  "author": "Tim Wiegand",
  "license": "BSD-3-Clause",
  "repository": {
    "type": "git",
    "url": "https://github.com/TheCandidStartup/infinisheet.git",
    "directory": "packages/react-virtual-scroll"
  },
  "bugs": "https://github.com/TheCandidStartup/infinisheet/issues",
  "homepage": "https://github.com/TheCandidStartup/infinisheet/blob/main/packages/react-virtual-scroll/README.md",
  "keywords": [
    "react",
    "reactjs",
    "virtual",
    "window",
    "windowed",
    "list",
    "scroll",
    "scrolling",
    "infinite",
    "virtualized",
    "table",
    "grid",
    "modern",
    "scalable"
  ],
  "types": "./dist/index.d.ts"
The repository properties are used to populate the link to GitHub. The directory property is there to support monorepo setups. Unfortunately, it doesn’t get used by the NPM UI, so the repository link goes to the root of the repo. There’s a separate “Homepage” link (which defaults to the same location as repository) which I pointed to the package README using the homepage property.
The types badge in the NPM UI requires the types property to be populated even though TypeScript doesn’t need it.
Conventional Commits
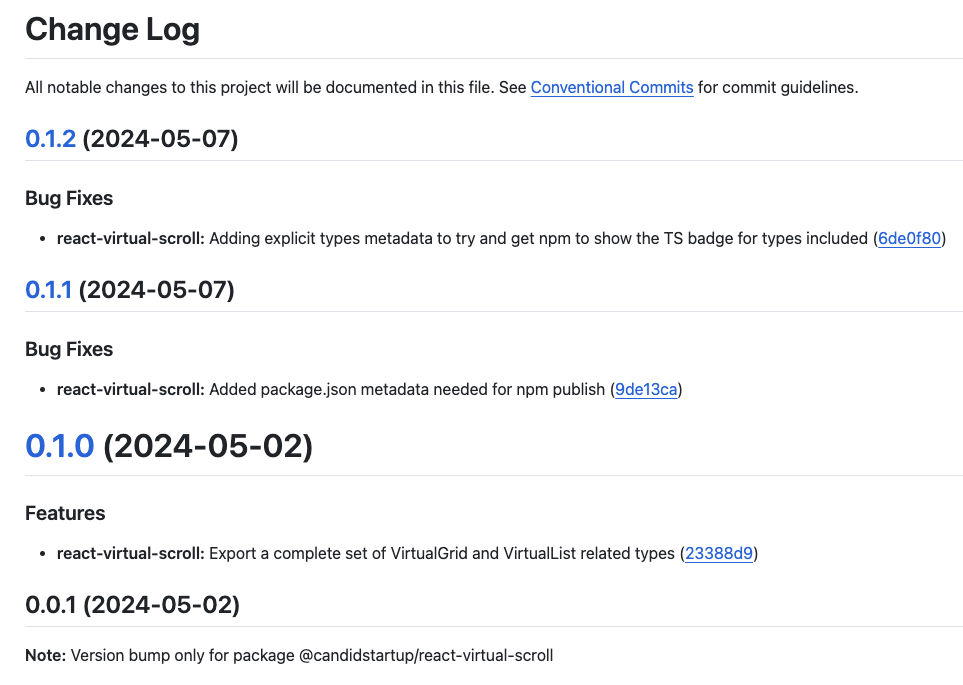
More prep that I didn’t know I needed. It’s customary to have a CHANGELOG.md in your repo that describes what changed in each release of your package. That’s a pain to maintain.
What if you didn’t have to?
Conventional Commits is a specification for adding additional structure to your commit messages. It dovetails with Semantic Versioning by describing the features, fixes and breaking changes made in commit messages.
Each commit starts with a type, optional scope and description. The body of the commit can be followed with optional footers that add more meaning.
<type>[optional scope]: <description>

[optional body]

[optional footer(s)]
The only defined types are fix for bug fixes (PATCH in semantic versioning) and feat for new features (MINOR in semantic versioning). You’re free to use additional types to describe other sorts of commit. In practice most people use a standard set of types.
Scope can be anything but usually identifies a particular feature or area of the repo.
The only defined footer is BREAKING CHANGE (MAJOR in semantic versioning). Again, you’re free to add others for your own purposes.
Versioning
Before we can publish, we need to version our package. I chose Lerna as my monorepo tool because it has workflows that automate versioning and publishing. It can use conventional commits to generate the new version number and update dependencies in package.json files to match. By default it will apply the same version number to all workspaces with changes.
It will also generate and update CHANGELOG.md files. One at the root of the repo containing all changes, and one in each workspace listing just the changes that effect that workspace. The change log includes the descriptions from each fix and feat commit, tagged by scope.
You can configure how versions are updated and change logs generated in your lerna.config. I’ve added entries to ignore changes to unit tests.
{
  "$schema": "node_modules/lerna/schemas/lerna-schema.json",
  "version": "0.1.2",
  "ignoreChanges": [
    "**/src/test/**",
    "**/src/*.test.*"
  ],
  "command": {
    "version": {
      "message": "chore(release): version %s"
    }
  }
}
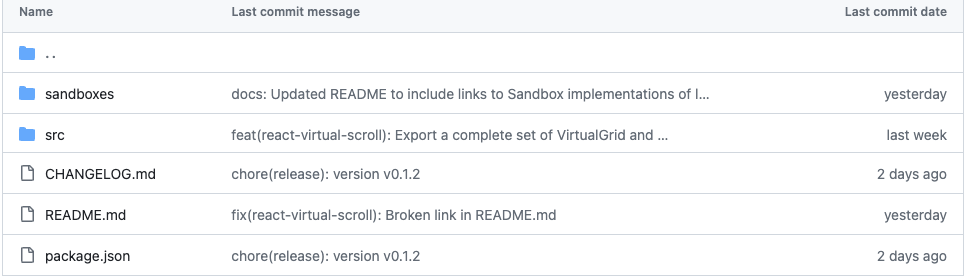
Lerna will create a commit for all the changes that it’s made, tag everything with the version number and push the changes to GitHub. I added another config entry so that Lerna’s commit message uses the conventional commits chore type.
Don’t make the same mistake I did and create a “version” script in your top level package.json to run lerna version --conventional-commits for you. It turns out “version” is the name of a predefined lifecycle script that lerna version will run for you, leading to hilarious infinite recursion fun. Luckily it errored out the second time through.
Once I figured that out, I got a successful run.
% npx lerna version --conventional-commits
lerna notice cli v8.1.2
lerna info current version 0.0.1
lerna info Looking for changed packages since v0.0.1
lerna info ignoring diff in paths matching [ '**/src/test/**', '**/src/*.test.*' ]
lerna info getChangelogConfig Successfully resolved preset "conventional-changelog-angular"

Changes:
 - virtual-scroll-samples: 0.0.1 => 0.1.0 (private)
 - @candidstartup/react-virtual-scroll: 0.0.1 => 0.1.0

? Are you sure you want to create these versions? Yes
lerna info execute Skipping releases
lerna info git Pushing tags...
lerna success version finished
Publishing
Now we’re finally ready to publish our newly versioned packages. Lerna can version and publish in one step if you prefer, but I like being able to review what it did before pushing out to the world. I used lerna publish from-git to publish the packages with the latest committed version. Alternatively, you can use lerna publish from-package to publish any packages newer than the latest packages on NPM.
% npm run lerna-publish

> lerna-publish
> npx lerna publish from-git

lerna notice cli v8.1.2

Found 1 package to publish:
 - @candidstartup/react-virtual-scroll => 0.1.2

? Are you sure you want to publish these packages? Yes
lerna info publish Publishing packages to npm...
lerna WARN notice Package failed to publish: @candidstartup/react-virtual-scroll
lerna ERR! E404 Not found
lerna ERR! errno "undefined" is not a valid exit code - exiting with code 1
That’s a really unhelpful error message. After some Googling I realized that I needed to run npm login on the command line first. Which in turn launches a web browser so that I can enter username, password and a Google Authenticator OTP (one-time password) code.
Let’s try that again.
% npm run lerna-publish

> lerna-publish
> npx lerna publish from-git

lerna notice cli v8.1.2

Found 1 package to publish:
 - @candidstartup/react-virtual-scroll => 0.1.2

? Are you sure you want to publish these packages? Yes
lerna info publish Publishing packages to npm...
? This operation requires a one-time password: ******
lerna success published @candidstartup/react-virtual-scroll 0.1.2
lerna notice
lerna notice 📦  @candidstartup/react-virtual-scroll@0.1.2
lerna notice === Tarball Contents ===
lerna notice 1.5kB  LICENSE
lerna notice 18.8kB dist/index.js
lerna notice 1.5kB  package.json
lerna notice 38.2kB dist/index.js.map
lerna notice 2.8kB  README.md
lerna notice 2.9kB  dist/index.d.ts
lerna notice === Tarball Details ===
lerna notice name:          @candidstartup/react-virtual-scroll
lerna notice version:       0.1.2
lerna notice filename:      candidstartup-react-virtual-scroll-0.1.2.tgz
lerna notice package size:  14.4 kB
lerna notice unpacked size: 65.7 kB
lerna notice shasum:        6cd84089f7b724d8c1d61f1b9ae910a3679f493e
lerna notice integrity:     sha512-0zuqSwVhFtb8D[...]8YvmraVskjPqw==
lerna notice total files:   6
lerna notice
Successfully published:
 - @candidstartup/react-virtual-scroll@0.1.2
lerna success published 1 package
If you have two factor authentication enabled, NPM requires you to enter the OTP code again when you publish. If that gets too annoying I can look at setting up an automation token for fully automated publish.
Back to npmjs.com.
Success. I have a published package released to the world.
NPM Tools
Once you have a package published, there are lots of tools out there to play with.
Badges


Shields.io generates those cool badges that people like to add to their READMEs, including ones dynamically populated with data from NPM.
I wonder how many more versions I’ll publish before you read this. Check the badge for the latest version.
Are the types wrong?
I was unsure whether the types were configured correctly in my package. The TypeScript compiler has too many options to try them all. Are the types wrong? will tell you what works.
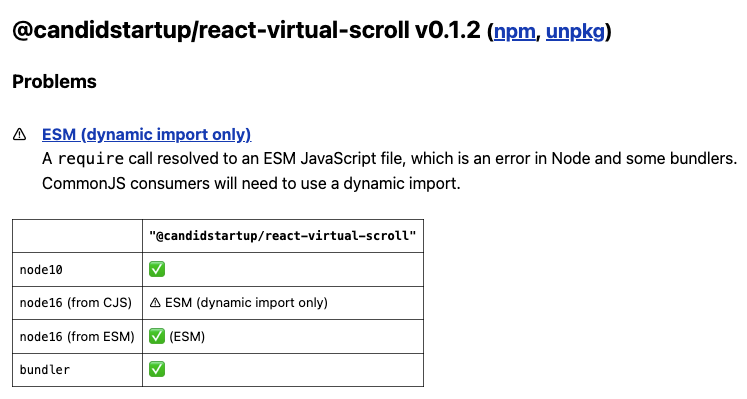
It all looks as expected. I’ve only provided an ESM build, so if you insist on importing into a CommonJS module you’ll need to use a dynamic import.
CodeSandbox
The react-window library has lots of bare-bones examples that you can open in CodeSandbox with a single click. I found them to be tremendously useful. You can see exactly what you need to get started. You have the reassurance that the examples actually work. You can play around with them and see what happens when you change the input props.
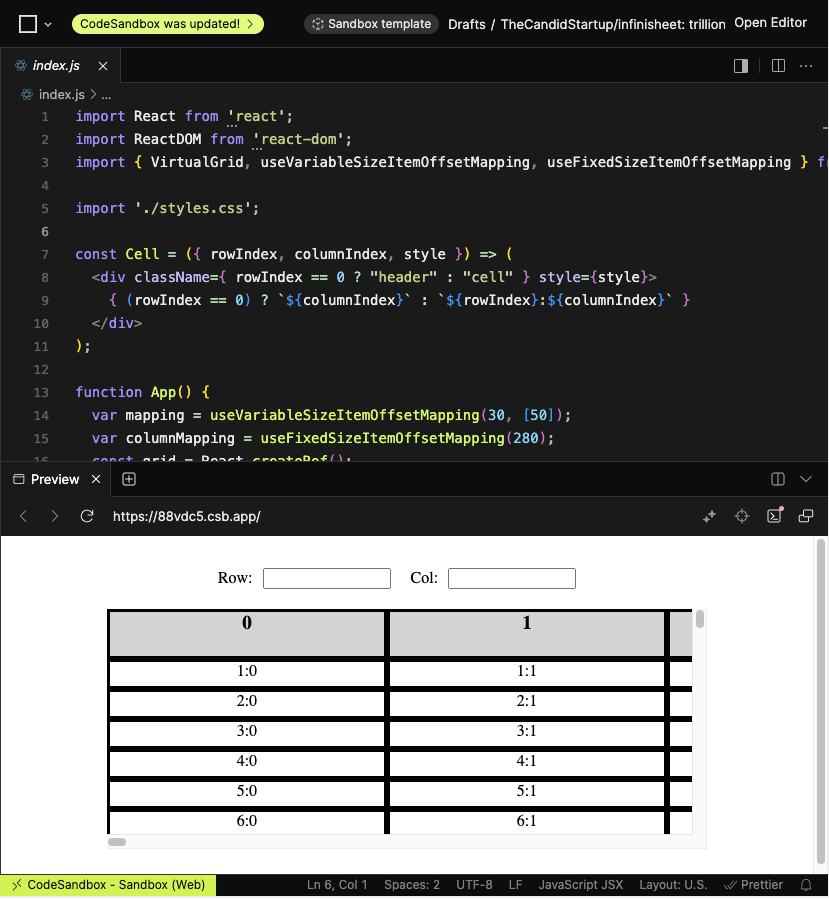
There’s no account needed. All you need is a self-contained sample project in GitHub. Embed the path in a CodeSandbox URL and CodeSandbox will download the entry point, install dependencies from NPM (including @candidstartup/react-virtual-scroll) and bring up an editor and the running sample.
I was so impressed that I put together Sandbox samples for VirtualGrid and VirtualList. Obviously, I wanted to be able to test them locally before committing and pushing to GitHub. That turned out to be more difficult than I thought.
I could only get CodeSandbox to work when the entry point is a .js file. The sample includes JSX which CodeSandbox is happy with. Vite isn’t. It requires any code that includes JSX to have a .jsx extension. I needed some vite.config magic from Stack Overflow to force Vite to accept JSX in .js files.
Next Time
That’s more than enough time messing around with tooling. I need to get some more react-virtual-scroll features implemented and have a real reason to push out another release.