It’s been a couple of months since I last worked on features for my scalable React spreadsheet component. I got distracted by adding Playwright and Storybook to my arsenal of development tools. The next step is to add all my components to Storybook and publish it as part of my documentation set.
Before I do that, I want to get my spreadsheet component into a good place. I want it to be Edit Ready.
Edit Ready
I’m building a scalable spreadsheet frontend component because ultimately I want to build a scalable spreadsheet backend. So far, I have a data interface and some fake data. I’ll need a real implementation once I have a frontend that can edit data.
I’ve been working towards this for a while and I’m pretty close. Selection is supported with an input box positioned under the focus cell ready to receive changes. It’s mostly a matter of tidying up at this point.
Data Interface for Cell Size
Currently cell width and height are hardcoded in the VirtualSpreadsheet component. The correct cell size to use depends on the data in that cell. Eventually, the cell size will need to be editable. It should definitely be part of the data interface.
export interface SpreadsheetData<Snapshot> {
  subscribe(onDataChange: () => void): () => void,
  getSnapshot(): Snapshot,

  getRowCount(snapshot: Snapshot): number,
  getRowItemOffsetMapping(snapshot: Snapshot): ItemOffsetMapping,
  getColumnCount(snapshot: Snapshot): number,
  getColumnItemOffsetMapping(snapshot: Snapshot): ItemOffsetMapping,
  getCellValue(snapshot: Snapshot, row: number, column: number): CellValue;
  getCellFormat(snapshot: Snapshot, row: number, column: number): string | undefined;
}
I’ve added two new methods that return an ItemOffsetMapping object that describes sizes and offsets in one dimension. Calls to these methods replace the hardcoded mapping objects currently used by VirtualSpreadsheet.
I needed to update all my existing implementations of SpreadsheetData to add the new methods. I was surprised how many I had. Given that I’ll be making lots of other changes in future, I want to minimize the pointless busy work of adding default implementations for new methods.
I have an EmptySpreadsheetData implementation which has appropriate defaults for all methods. I changed my other implementations to start from TestData extends EmptySpreadsheetData rather than TestData implements SpreadsheetData<number>.
The ItemOffsetMapping interface is defined in react-virtual-scroll so needed to be imported. API Extractor reminded me that I needed to re-export it from react-spreadsheet to have a complete public API.
Error: dist/index.d.ts:24:5 - (ae-forgotten-export)
  The symbol "ItemOffsetMapping" needs to be exported by the entry point index.d.ts
Once I did that I got a load of new errors.
Warning: react-virtual-scroll/src/VirtualBase.ts:109:1 - (ae-unresolved-link)
  The @link reference could not be resolved:
  The package "@candidstartup/react-spreadsheet" does not have an export "VirtualList"
Warning: react-virtual-scroll/src/VirtualBase.ts:109:1 - (ae-unresolved-link)
  The @link reference could not be resolved:
  The package "@candidstartup/react-spreadsheet" does not have an export "VirtualGrid"
Error: react-virtual-scroll/src/VirtualContainer.tsx:1:1 - (ae-wrong-input-file-type)
  Incorrect file type; API Extractor expects to analyze compiler outputs with .d.ts extension
  Troubleshooting tips: https://api-extractor.com/link/dts-error
This took me a while to work out. Importing and exporting ItemOffsetMapping resulted in import { ItemOffsetMapping } from '@candidstartup/react-virtual-scroll' being added to the index.d.ts file for react-spreadsheet. Makes sense.
The import was being resolved by parsing the source code within react-virtual-scroll rather than using its index.d.ts. It turns out that this is the first time I’ve used a type defined in one package as part of the API of another. By default, API Extractor uses tsconfig.json which does indeed resolve inter-package references within the monorepo by reading source code.
I needed to add tsconfigFilePath: "tsconfig.build.json" to api-extractor.json to force it to use built packages when resolving dependencies.
Data Interface for Cell Edit
The data interface also needs a method for changing the contents of a cell. I decided to use a single method that sets both value and format. When typing new text into a cell, the input is parsed to try and determine the format. The end result is that both value and format need to be set for the cell.
Cell values, particularly numbers, depend on the format for correct interpretation. It seems safest to require value and format to be set together, even when editing.
export interface SpreadsheetData<Snapshot> {
  ...
  setCellValueAndFormat(row: number, column: number, value: CellValue,
    format: string | undefined): boolean;
}
I’m going with naive error handling for now, returning true or false. Existing read only implementations return false. I’ll revisit error handling when I better understand the sort of errors that might be encountered with a real implementation.
Content Alignment
Excel and Google Sheets align content in a cell based on type.
- Numbers (including dates) align right in each cell
- Text aligns left
- Booleans and errors align in the center
This might seem like a minor feature but the way I’ve implemented it adds a lot of power. Each cell has an extra modifier CSS classname based on type. Now you can do all kinds of interesting presentational things based on type. Alignment is just the tip of the iceberg.
export interface VirtualSpreadsheetTheme {
  ...
  VirtualSpreadsheet_Cell__Type_string: string,
  VirtualSpreadsheet_Cell__Type_number: string,
  VirtualSpreadsheet_Cell__Type_boolean: string,
  VirtualSpreadsheet_Cell__Type_null: string,
  VirtualSpreadsheet_Cell__Type_undefined: string,
  VirtualSpreadsheet_Cell__Type_CellError: string,
}
I added the new class names to the spreadsheet theme object and updated VirtualSpreadsheet.css.
.VirtualSpreadsheet_Cell__Type_string {
  text-align: left;
  padding-left: 2px;
}

.VirtualSpreadsheet_Cell__Type_number {
  text-align: right;
  padding-right: 2px;
}

.VirtualSpreadsheet_Cell__Type_boolean {
  text-align: center;
}

.VirtualSpreadsheet_Cell__Type_null {
  text-align: center;
}

.VirtualSpreadsheet_Cell__Type_undefined {
  text-align: center;
  background-color: whitesmoke;
}

.VirtualSpreadsheet_Cell__Type_CellError {
  text-align: center;
}
Name and Formula Bar
A proper spreadsheet has a Formula input field at the top. I laid out Name and Formula input fields as you’d expect to see them - as an input bar across the top of the spreadsheet with Name on the left and Formula on the right. I got rid of the Scroll To label that was left over from the original grid control sample app.
For now, Formula displays the same text as the cell with the focus. Real spreadsheet implementations have all kinds of complex and subtle behavior, where the formatting in the formula field may not be the same as the cell display format. For example, you need to ensure that the value can be reliably round tripped without losing precision.
I’m not going to explore all of that now, just start with the simplest thing that lets users enter new data. Whatever text is present when the user hits Enter is parsed using the numfmt package parseValue method.
function CommitFormulaChange(rowIndex: number, colIndex: number) {
  let value: CellValue = undefined;
  let format: string | undefined = undefined;
  const parseData =  numfmt.parseValue(formula);
  if (parseData) {
    // number or boolean
    value = parseData.v;
    format = parseData.z;
  } else {
    // string
    value = formula;
  }

  data.setCellValueAndFormat(rowIndex, colIndex, value, format);
}
The parsed value and format are applied to the cell, again ignoring error handling for now.
Cell Edit Mode
Real spreadsheets also allow you to edit cell content in place. The focused cell is either in display mode or edit mode. If you start typing text into a cell in display mode, it switches into edit mode with the new text overwriting the existing value. You can switch into edit mode and preserve the existing value by pressing Enter, double clicking or by using the Formula field.
The changes are saved when you press Enter or move to another cell. Alternatively, press Escape to revert your changes.
The implementation uses new cellValue and editMode state.
const [cellValue, setCellValue] = React.useState("");
const [editMode, setEditMode] = React.useState(false);
The editMode state controls whether the focus sink input field is hidden below the focused cell (display mode) or placed on top (edit mode). I changed the grid styling so that cells have an opaque background. It was too confusing seeing the text caret underneath the cell contents when in display mode.
The cellValue state controls the value shown in the focus sink input field. The value is an empty string when in display mode and the same as Formula when in edit mode.
function updateFormula(rowIndex: number, colIndex: number, editMode: boolean) {
  if (rowIndex < dataRowCount && colIndex < dataColumnCount) {
    const dataValue = data.getCellValue(snapshot, rowIndex, colIndex);
    const format = data.getCellFormat(snapshot, rowIndex, colIndex);
    const value = formatContent(dataValue, format);
    setFormula(value);
    setCellValue(editMode ? value : "");
  } else {
    setFormula("");
    setCellValue("");
  }
}
Existing spreadsheets, like Google Sheets, flip a cell into edit mode when you start typing, overwriting existing content. Having the input field empty to start with means we can use the onChange event as a trigger to switch to edit mode and naturally get overwrite behavior.
focusSink = <input
  value={cellValue}
  onChange={(event) => {
    setCellValue(event.target?.value);
    setEditMode(true);
    setFormula(event.target?.value);
  }}
  style={{ zIndex: editMode ? 1 : -1, {...position} }}
  onKeyDown={onEditValueKeyDown}
  {...rest}
/>
Interacting with Formula also enables edit mode.
<input className={theme?.VirtualSpreadsheet_Formula}
  value={formula}
  onChange={(event) => {
    setFormula(event.target?.value);
    setEditMode(true);
    if (focusCell)
      setCellValue(event.target?.value);
  }}
  onFocus={() => {
      if (focusCell) {
        setCellValue(formula);
        setEditMode(true);
      }
  }}
  onKeyDown={onEditValueKeyDown}
  {...rest}
/>
Key Down Handler
The details of key down handling are what makes VirtualSpreadsheet feel like a spreadsheet rather than a grid in fancy dress. There’s lots of subtle behavior changes depending on edit mode, and whether a cell, row or column is selected.
Once you’re in edit mode there’s no difference in behavior between the formula and focus sink inputs. I use the same input handler for both.
function onEditValueKeyDown(event: React.KeyboardEvent<HTMLInputElement>) {
  if (!focusCell)
    return;

  const row = focusCell[0];
  const col = focusCell[1];

  if (editMode) {
    switch (event.key) {
      case "Escape": {
        updateFormula(row, col, false);
        setEditMode(false);
        setFocusCell([row, col]);
      }
      break;

      case "Enter": {
        CommitFormulaChange(row, col);
        updateFormula(row, col, false);
        setEditMode(false);
        nextCell(row,col,true,event.shiftKey);
      }
      break;

      case "Tab": {
        CommitFormulaChange(row, col);
        updateFormula(row, col, false);
        setEditMode(false);
        nextCell(row,col,false,event.shiftKey);
        event.preventDefault();
      }
      break;
    }
  } else {
    switch (event.key) {
      case "ArrowDown": { selectItem(row+1,col); event.preventDefault(); } break;
      case "ArrowUp": { selectItem(row-1,col); event.preventDefault(); } break;
      case "ArrowLeft": { selectItem(row,col-1); event.preventDefault(); } break;
      case "ArrowRight": { selectItem(row,col+1); event.preventDefault(); } break;
      case "Tab": { nextCell(row,col,false,event.shiftKey); event.preventDefault(); } break;
      case "Enter": {
        if (isInSelection(row,col)) {
          nextCell(row,col,true,event.shiftKey);
        } else {
          updateFormula(row, col, true);
          setEditMode(true);
        }
      }
      break;
    }
  }
}
You can use Enter and Tab to navigate around the grid in both display and edit modes. Hold down the shift key to move backwards. When a cell is selected, Enter moves up and down while Tab moves right and left. When a row or column is selected, Enter and Tab both move the focus cell backwards and forwards within the selection.
In contrast, the arrow keys can only be used to navigate in display mode. In edit mode they work as normal for moving around within the text being edited.
Any changes made in edit mode are applied by pressing Enter or Tab. We go back to display mode and reset the content of Formula to the stored value when moving to a new cell or using the Escape key.
The isInSelection utility function is used to determine whether a cell is within a selected row or column. The nextCell utility function determines the appropriate cell to move to for Enter and Tab.
  function nextCell(row: number, col: number, isVertical: boolean, isBackwards: boolean) {
    if (selection[0] === undefined && selection[1] === undefined)
      return;

    const offset = isBackwards ? -1 : 1;

    if (selection[0] === undefined) {
      // Column selected - move vertically within existing selection
      selectItem(row+offset, col, true);
    } else if (selection[1] === undefined) {
      // Row selected - move horizontally within existing selection
      selectItem(row, col+offset, true);
    } else {
      // Cell selected
      if (isVertical)
        selectItem(row+offset,col);
      else
        selectItem(row,col+offset);
    }
  }
Focus
The most difficult thing was making repeated clicks on the same cell work properly. I don’t want to reselect the cell and reset any in-progress edited value. Easy, I thought, add an early out to selectItem that does nothing if the selection hasn’t changed. However, I then found that the cell would lose focus on repeated clicks.
There’s a grid level mouse click handler that determines which cell has been hit and makes that the focused cell, moving the focus sink input underneath it. A React effect is used to give focus to the focus sink. We need an effect as the focus sink isn’t created until the first time a cell is selected. As we don’t want to steal focus from other elements on the page, the effect is dependent on the focusCell state. Which neatly also handles the case when moving from cell to cell. When focusCell changes, make sure that cell has focus.
So, if you click the focus cell again in display mode, the browser removes focus from the focus sink, invokes the grid mouse click handler which sees that the same cell has been clicked again and does nothing. The focusCell state doesn’t change, the effect doesn’t run and we’ve lost focus.
After a few false tries I ended up arranging the code so that repeated clicks don’t change the selection, don’t apply any side effects associated with a change in focus cell but do set the focusCell state.
You might think that won’t do anything because React compares old and new state so that it can optimize for the case where a state value hasn’t changed. We get away with it because focusCell is an array of [row, column] and React uses a shallow compare.
I’m not happy with this solution. It feels fragile and “too clever”.
I later realized that I could handle this case more directly by explicitly giving focus in the click handler. However, I would still need the effect to handle focus when the focus sink is first created. In the end I would just be replacing seemingly redundant calls to setFocusCell([row, column]) with focusSinkRef.current?.focus().
I’m not sure which I dislike more, so left things as they are for now.
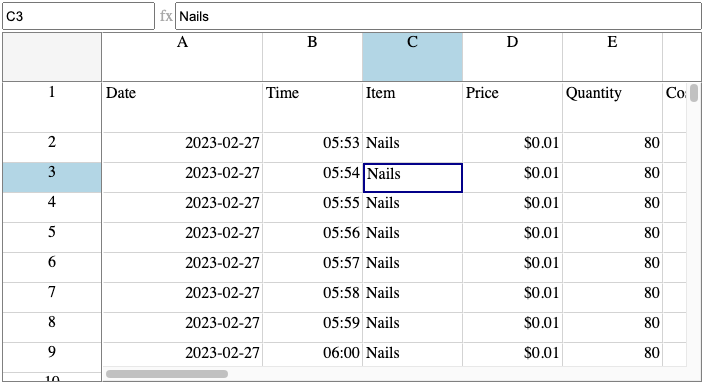
Try It!
Start by selecting something and then moving around the grid using arrow keys, tab, shift-tab, return and shift-return. See how things change depending on whether you select a cell, row or column to start.
Use one of the four different ways to go into edit mode and try to make some changes. Do you use the formula bar or the in-cell input?
Next Time
VirtualSpreadsheet is edit ready. Now I need to make the changes stick. Before I address that, I’m going to go back and build out a Storybook containing VirtualSpreadsheet and all the other Infinisheet components.